Showing posts with label bag. Show all posts

Sunday, July 1, 2012

Pattern Tester: "Read" Book Bag

A few weeks ago I signed on to be a pattern tester for Michelle at City House Studio. I finally pushed everything to the side and actually fulfilled my promise of making the bag, and I love it! It appears I was late in getting it done because she's already released the pattern, but I still love mine. It turned out so very cute.

The only reason it's sitting out like that is because I wanted you to see all the letters. I also didn't put anything in it so it's standing on it's own. There is an option to quilt the letters or applique. I chose to quilt since I have been wanting to try it.
I made mine in red canvas and used a brown canvas material I had in my stash. Actually everything in this bag was from my stash. My books have selvage titles (Love Birds, Yankee Doodle, and Seuss), an embroidered title (Holes) and an FMQ title (Cook). I didn't have any fabric that looked like wood for the bookshelf so I FMQed it to look like wood.
Kind of just swirly but gives the idea.
I modified a tiny bit by adding a taller pencil/pen pocket on the inside since I figured this would be for the library or I may use it take my script and stuff to play practice. The pattern called for a regular strip pocket subdivided into three which I also did.
I also modified the handles. I initially cut out the brown canvas for the handles but decided I didn't want to FMQ it all so I did one side canvas and one side the liner fabric.
I love how it turned out. You should SO check out this pattern!  She is giving one way right now so run over and sign up to win before July 4th!


Fresh Poppy Design
 

WIP Wednesday at Freshly Pieced

Friday, June 29, 2012

Reconfiguring...

I was all excited at how much progress I've made on my Bottled Rainbows quilt, especially since it has to be done by August for my quilting guild's little wrap up for it. So far I have totally finished 14 blocks, and 3 have scraps to be sewn on (they are glued down so I used them in the picture below). Yes, I know how to count. I know that's 17, not 16. When I first got the fabrics, I had one called blue jay in the mix which was not exactly my favorite color. It was not a blue I use much and I was afraid I wouldn't have enough to make a block, so I pulled together some leftover jade from my Riley Blake Christmas quilt and made another block. Now it looks like I will have enough to do the blue jay one too. My first instinct was to make a second extra and turn them into pillow shams. But today I placed them all on my queen sized bed to insure they would fit and, low and behold, I need another row deep to make it fit.

I was planning on a border just to make sure the drop was enough to cover the sides (I have a sleigh bed and the mattresses show), so I measured to see if the border would be enough. I need approximately 8 inches more to get the drop I want on both sides, and 8 inches is not enough to complete the top to bottom. In fact, with 8 inches added to the top and bottom, it would not quite touch the headboard or footboard. If I decided to cover the pillows with the quilt instead of having the pillows on top of the quilt, I would definitely need another row. So, in my infinite insanity, I have chosen to create 3 more blocks. So now instead of being within 3 of being done, I am within 6. Just when you think you're closing in on a finish line. But I really do think it will be worth it. It will be plenty big and the border will give it a bit more that can either be tucked in at top and bottom or used to cover and tuck pillows. Plus, if it shrinks any in the wash, it will be worth it to have it bigger.

I am also hard at work being a pattern tester. I finished the book side of the "READ" bag and started the letters too. So far the pattern is very well written. Hopefully I will finish soon and can review it all together, but until then here's a sneak peak...


Yeah, I don't know if it's because I've been working on the BR quilt but my 'neutral' ended up being a bit more colorful than originally planned. But I think I'm going to like it more colorful anyway. Hope your weekend is looking promising. We finally do our first read thru for Seussical tomorrow morning so I'm excited!

Wednesday, June 6, 2012

WiP...A Whole New Bag!

Looking for a Pay It Forward? Please check out Pam's here. She hasn't had any response for it as of yet, but is excited about the process.

I've been planning this for a couple of weeks but when I saw Purse Palooza out there, I made myself wait before making it. It got me all motivated! My first bag endeavor for the month is a new beach bag! Check it out!

This is from a free pattern over at Reanna Lily Designs. I used the polka-dot fabrics from a charm swap I participated in with Lindsay over at Craftbuds back in January. I was a little worried that it might be a bit overwhelming but I really love how it turned out. I used solids on the sides with polka-dotted pockets for both sides. I kept one side pocket whole and divided the other into sections.

I used muslin on the inside just to keep it basic. And (though my FMQ is not great) I wrote 'beach' on the both sides. This thing is huge. It's got two large beach towels in it for the picture but it could hold at least two more easily which is perfect for us. And it's just in time for swim lessons!

I also am up to 3 on my Bottled Rainbows. The orange and red blocks are made; I just have to put the scraps on.
Linking up to Lee's!

WIP Wednesday at Freshly Pieced   Ellison Lane Quilts

Sunday, May 27, 2012

A Tip for All You Bag Ladies Out There

Before I started quilting I made bags. Because of the costs involved in the hardware associated with bag making, I started looking for alternative ways of finding these jewels....NO, I didn't steal them! I just started taking purses apart!  Most of us have some sort of thrift store or Goodwill in our area. I would hit my local shop and buy purses from the markdown bin with loads of hardware in them. I have also done some demo on my own purses that are worn out.
Well, something new struck me the other day after the kids came home from the last day of school: backpacks! Yup, how many times have I thrown them away because they were so worn out and awful looking, but didn't take them time to check the hardware? This is what I took so far from my kids' book bags this year.
A zipper at least 12 inches long that can be cut down, 4 swivel clips and D rings, 3 slides and a slide release buckle. There are also 2 slides in black from my son's backpack. I haven't tackled his zippers yet. I will say this about recycling hardware: make sure it's worth your time to remove. If there are scratches and dings on it, if you wouldn't won't it in a piece you made, then don't remove it. All of my pieces were in great shape (especially in comparison to the bags!) so I took them all. With zippers, you can usually tell within the first couple of snips with the seam ripper whether or not it will be too dirty to worry with. Plastic holds up to a lot but zippers do get dirty. If it is only mildly dirty, zippers can also be hand washed. If you think re-using the zipper is not your thing, that's fine. But remember that only the center of the zipper is even visible in most crafts anyway so no one is going to know that needles have been through it before. And, yes my zipper's ends need to be trimmed but ends are hidden in most crafts anyway. You will just need to remember to sew the ends together on both ends so the zipper pull will not come off either end while your'e working with it.

It is also important to figure out how involved it will be to remove the hardware. My son's backpack has two zippers I'm still contemplating removing. One would be really great because it's long, but it's also really complicated getting it out.

What other hardware have I removed? O rings and magnetic snaps. Depending on where you get them, magnetic snaps can be very costly. When I purchase them, I usually hit Joann's because they have a brand where I can get 4 for the same price you would normally buy 1 for in other stores. I have not attempted it yet but you may also be able to remove purse feet (though these are more likely to be tarnished and damaged because of the wear and tear) and metal purse frames found on snap change purses.

Happy hardware hunting!

Saturday, May 5, 2012

A Bag for Moi!

Today's the last day for my giveaway. Need some boy fabric or a binding tool? Come check it out here! I will draw a winner in the morning.

I finally finished it! A week or so late but it's done. I used Cherie's pattern to make my own travel bag! My original plan was to make this for my trip with my sis, mom and grandma but I didn't get it done in time. I finally bit the bullet today and decided I was going to get it done.

So cute! I love it. I used printed duckcloth and lined it with muslin like the instructions said to do. It has a front pocket and a side pocket that is zippered.

And this bag is bigger than I thought it would be from the pictures. To give you an idea. This is what I stuffed it with to show the shape.... a case of Girl Scout cookies and a queen sized blanket!

I will say that there was only one thing that bothered me about it that I will go back and fix. There are raw edges on the inside of the bag.

So my plan is to make some binding tape from some of the extra muslin I bought and cover them on the inside so no stray threads get on my clothes when I pack it. Overall I am very pleased with how it turned out and can't wait to make another one. I bought the same circle fabric in orange so I can have a set. I'm not a big floral person for bags. I like designs more.

Now I really have to get busy. My sister wants an iPad case and I also plan on trying to make a little toiletry bag for a friend before Monday if I possibly can. My friend was recently diagnosed with breast cancer and her last day working at the school I used to work at is Monday (she's starting treatment). They're having a little get together for her and I wanted to run by and see her. I also found out that another friend has been recently diagnosed with pancreatic cancer. This is so devastating. She has two young children; the daughter is in our Girl Scout troop. If you pray, please say some prayers for these two families. They are about to have to deal with some really overwhelming situations.

Wednesday, April 18, 2012

WiP and a Callout to Fellow Quilters

First the callout: if you knew someone in need to make a difference in a community, would you help? My bloggy buddy Michele has sent out the word that she needs star blocks in red, black and white. These blocks will be sewn into a quilt which will be raffled off as part of an annual baseball tournament which is held in remembrance of her late nephew, Danny. All the details can be found here. I'm sure she'd appreciate any star blocks you could send her way.

As far as progress goes this week, there wasn't a lot. I got my Granny Square shams done to go with the twin quilts.
I'm also trying to get things together to make a travel bag from Studio Cherie. Still can't find jute webbing unless I order it online so I may not have it done for my weekend trip with my sister, mom and grandma. So I decided to make up a quick bag I could take.
It's just a little pouch but I needed something for my chargers and such. I thought that Heirloom fabric by Joel Dewberry was just the trick. Very cute!
Now back to my jute webbing search! Oh, and I'm pretty sure today is the last day to vote for the Accuquilt Barn Quilt contest. Make sure you get over there and vote. If you happen to like 18, 94 and 100, I sure appreciate your vote!
And don't forget to check everyone else's progress over at Lee's!

WIP Wednesday at Freshly Pieced

Tuesday, April 17, 2012

Family: It's a Good Thing

It's been a busy day. I spent the morning at the Minute Clinic only to confirm what I already figured out. Ear infection and beginning sinus infection. Yahoo for me. At least I don't feel bad; just can't hear well out of one ear.

Tomorrow is the final day for voting in the the Accuquilt Barn Quilt Contest. Blocks 18, 94, and 100 are mine and I greatly appreciate your vote if you like them!

I finally delivered the shams for the twin quilts and had to come up with a price for my work. I'm really not good at this. My husband says I have a tendency to underprice things, but I also make most things for family and friends so it's hard for me to charge my family lots of money. I had kept up with the cost of the supplies so I was gauging my prices on that. My hubby's wonderful aunt and uncle thought I had undercharged and added more to my totals. Yeah family! I need to talk to hubby but I could register for the Sewing Summit with what I made on these quilts. Yahoo! Just have to figure out if I can go.

Also along the "family" conversation, my sister set up a trip for us this weekend. It will be her, myself, my mom, and my grandmother in the mountains all weekend by ourselves. Aaahhh!!! I'm trying to do a mad dash and make one of these bags by StudioCherie.
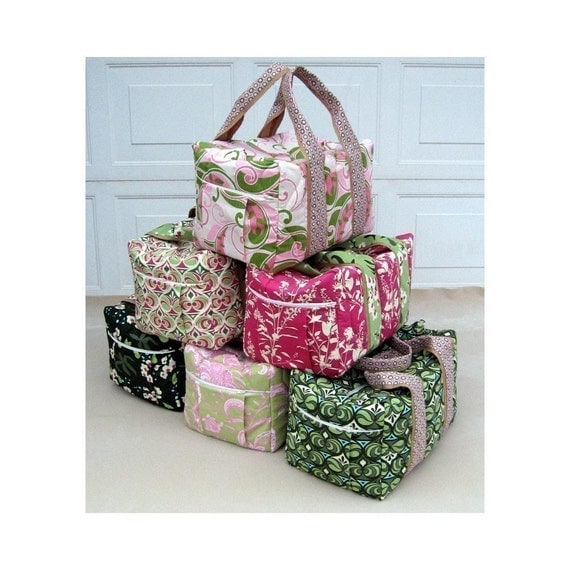
Sewing Pattern for Travel Duffle PDF format
I'm still figuring out where to get some jute webbing for the straps. Otherwise the rest should come together fairly quickly.

Sunday, June 5, 2011

Relaxing on Sunday

Not a lot of sewing going on here but I have been busy. So far I've cut out 188 hexie shapes so I'll have something to do later next month when we go to the beach. I like being prepared when we have a long drive ahead. Usually I take crossword puzzles for me and hubbie, as well as one of the card containers from the Trivial Pursuit game. That usually keeps us occupied. Oh, and our iPods. We are both podcast addicts. But I thought I'd like to take along some things that would make me feel productive. So I'm taking hexies, and if I can ever get them done, some of my Embroidery 101 squares to be embroidered. I like things that travel when you can't really take the old sewing machine.
I actually got a stack of fabric cut already too. I just used some of my bigger scraps so it's actually turned into a bit of a stash buster, which is nice.
Yesterday I got a little goodie in the mail. Did anyone else visit the greenbaglady during the Giveaway Day? Well, I did and she sent me a free bag to make and one to give away. She strongly encourages being 'green' by sending out fabric to others so they can make their own bags for shopping. The bag she made and sent is cute, but I love the fabric she sent for me to make one.

I think I'm going to add some of my fabric to make the handles a little longer so I can carry it on my shoulder. Not sure who I'll give the other one to. I have cloth bags already, some of which I've had for about 20 or so years. I've had mine since before they were 'trendy' or 'green'. I just like them. I have some the say "Earth bags" and I have some newer ones my hubbie got me from drug reps (he's a pharmacist). The ones he got me are cool because they are those nice lined bags for refrigerated items. Love 'em! But back to GreenLady's bag. I may take it with me to the grocery store and offer it to someone there. I like doing good deeds at stores. I always overpring coupons for Hobby Lobby and offer them at the register; I also like to cut out coupons I don't use and leave them on the item in the store. Maybe someone can use it.

Hope you have a nice relaxing Sunday! Thing 2 and I are alone. Thing 1 spent the night next door with a friend and hubbie went on a trip with his dad today. Car shows! Anyway, Thing 2 is adamant that he play under the sprinkler today so I may take some more hexies outside to cut. See you guys tomorrow!

Friday, April 22, 2011

The Easter Bunny, a Bag, and More!

It's almost Easter! Are you and your family doing anything fun? I prepared my daughter for a trip to my parents house by sewing up a new travel bag for her. It was primarily based on this bag, but with modifications.
It's not as stiff as I would have liked. I only added lightweight interfacing. I wanted medium weight but couldn't find any. I wasn't sure I wanted heavyweight, but now I'm wishing I had. She loves it so it doesn't matter, but I will be using heavyweight on mine (since I want one too!). It's holding it's shape fairly well for a reason...
It's holding a case of Girl Scout cookies! Actually that shows off that it's a fairly good sized bag!
Here's a shot of the liner:

I think the liner is my favorite part! I almost wish I'd done the outside in this print. Very cute. I personally chose a different print for mine. Since I used this primarily from stuff in my stash, I'm linking up here!

I did a little shopping the other day and started picking up a few things for a future bottled rainbows quilt, but I also found a print for my bag. It would be the lime green on the left. 
I added a pocket on the inside, but I'm thinking I may add a large side pocket on the outside of mine. I've also seen them done with piping but I'm not sure I want to tackle piping.
So I think I'm going to do some work on my random reflections quilt today. My quilting guild is having a guest speaker tonight; Pat Knoechel of Quilt in a Day. I'm excited to see what she has to show us.

I hope everyone has a great Easter weekend!

Tuesday, April 12, 2011

Tutorial Tuesday

A friend of mine asked me to make her teenaged daughters purses for Christmas gifts. She wanted to incorporate their father's military fatigues into the purses, but all the ideas I kept finding online were more like tote bags. I figured tote bags would not be all that trendy. I finally decided, ya know what? Fabric is fabric. Just because it's fatigues does not limit what I can do with it. So I decided to use a great hipster bag tutorial I found online to create the following bag.
The change purse is from noodlehead's zippy wallet tutorial. I incorporated the fatigues into that as well. There were no other modifications except that I added the military patches to the front. I made one set with the zebra print and one with a strip that had lime green, back, hot pink, etc. My camera was broken at the time so I had to take this fabulous picture with my cell phone. Lovely, huh? I was actually able to use pants legs to cut out the material and still have a large shirt's worth of fabric to use when I make a purse for their mom. I am also trying to figure out a way to use the parts of the pant legs that have pockets already attached. Maybe some type of camping bag, or something to carry drawing supplies when out hiking?

Tuesday, March 29, 2011

Tutorial Tuesday: Hobo bag, modified

Okay, so my plan for Tutorial Tuesday is to either create my own tutorials or to show items I have made using other bloggers' wonderful tutorials. Today is the latter. Last weekend I was in need of a gift for an 8 year old girl so I created the following bag for use as a beach bag.
I used simply modern mom's Hobo Dance Bag Tutorial and found it very easy. I made only a few minor modifications to her original tutorial. After cutting my outside purse pieces, I added an applique letter to the front (the polka dots make it blend a bit) using Skip to My Lou's free printable letters for applique. I printed and cut out the letter I chose to use. Then I flipped my letter backwards and traced it on the paper side of a piece of Heat n' Bond.
 I cut out the Heat n' Bond letter and ironed it to the wrong side of my fabric following the instructions of the package. I then cut out my letter again, removed the paper, and ironed it to the front piece of the purse on the right side. I then machine stitched close to the edge of the fabric using a straight stitch. You could do this using a zigzag stitch as well, or you could handstitch it down using a blanket stitch.

I also added a pocket on the inside of the bag to keep little items that 8 year old girls like to carry around. Plus, I just can't make a bag without a pocket! I added the pocket at the beginning as well, right after cutting all the pieces for the inside and outside of the bag. I also added some medium weight interfacing to the outside bag pieces to give it some substance. I have noticed that some tutorials add their interfacing to the lining fabric but I like to put it on the outside fabric as it also keeps it smooth.
Instead of using  plain strips of fabric for the handles, I created tubes of fabric with which to create the braids. This was done because I used a cotton fabric rather than a canvas type fabric like in the original tutorial. I really didn't want to have to deal with fraying fabric. I just cut 2 1/2" strips of material in the length she recommended and created a long rectangle. Next, I folded the rectangle in half with right sides together to create a long, skinnier rectangle.  You can iron it if it helps you. Align the edges and sew a 1/4" seam along the edge using a straight stitch. 

You can then use attach a safety pin to one end and feed it back through so that it is right side out. After creating 3 tubes of both fabrics, I used the original instructions to attach one side of the handle and continued with her instructions from there.

I LOVE this bag. The 8 year old's mom has already hinted how much she loves it as well. I think she'd like one of her own. What's rolling around in my head right now is how to modify it in order to add a zipper. To add a magnetic clasp would be very easy to do. Hope you enjoy!