
I had hoped to not need catch up time but it looks like I do. I am finishing up my charm pack quilt and have not even begun quilting my Diamond Chains. Probably shouldn't have told you that, but I figured I'd fess up. It WILL be finished this week though so I will post it as soon as it is done.
As I said before, I do not reinvent the wheel. There are a ton of tutorials out there for quilt binding. Here are just a few.
Jaybird Quilts: includes instructions for adding a flange. I don't want it for this quilt but it would be cool to include on another quilt later.
Heather Bailey: continuous binding tutorial
Crazy Mom Quilts: uses crossgrain binding/also sews her strips together with a 90 degree angle.
Quilter's Cache: good explanation of all types.
Little Red Hen: this is how I usually do my binding. Machine stitch anchor and hand stitch the back.
A Girl in Paradise: stitch in the ditch on the front to catch it in the back. Great tips on how to use pins to make sure you're catching the binding in the back.
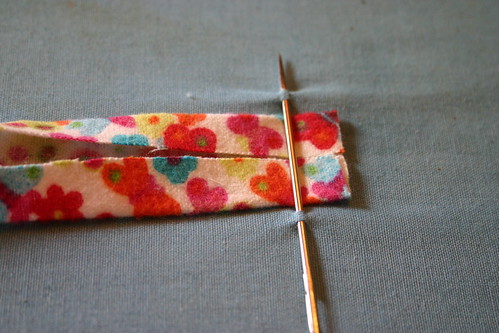
(Picture borrowed from All Things Fee)
I saw a neat way to get the folds in your binding by setting up a pin on your ironing board with an opening the size you want your folded binding and running it through the pin. Iron it as it comes through the other side. All Things Fee gives a quick explanation of this here.Here are a few variances in what different people do when they bind their quilts.
- Strip width can range from 1 7/8 to 3 inches. This is totally dependent on what you like. If you want a thicker binding to set things off, increase the size of your binding strips.this way.
- Strips can be attached at a 90 degree angle or a 45 degree angle. Some quilters avoid using a 90 degree angle because it is felt that it increases bulk, but I know a lot of quilters who do it.
Don't forget to put your updated quilt pictures or new quilts (if you are new to the quilt along) in the flickr pool. I will do the same! Our goal date for finishing is October 11 and the drawing for the prizes will be October 12th.
Update: Michelle from If Toys Could Talk mentioned a great technique I've seen in her comment below. When I questioned how you would attach the strips once you did the initial run around the front of the quilt, she came across this great video tutorial. Thanks Michelle!
2 comments:
Enjoyed your post and the information involved...thanks!
A quilting friend of mine gave me a tip for easy quilt binding. (I had been pressing the binding to create the folds and she said to skip that altogether. Simply fold your binding in half (wrong sides together), then line the raw edges up to the raw edge of your quilt. No ironing or pressing needed. Stitch in place and fold at the corners per usual. When you're ready to hand stitch the other side, simple fold it over and hand stitch in place. Easy peasy! :) Perhaps that would also help with the corners?
Post a Comment